Preparation
Make sure that the skin is clearly exposed. Remove all make-up, fake tan and jewellery. Ensure hair and clothing are not covering the area.
The area to be photographed should be well lit – make sure there aren’t any shadows falling across.
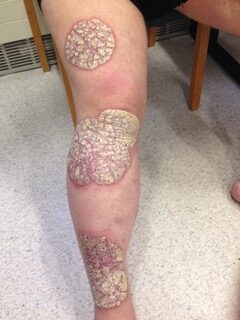
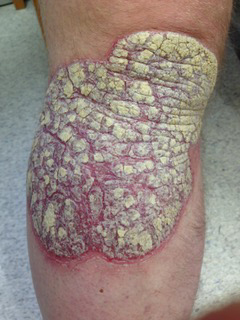
When photographing a rash
Please send an overview photo of the affected area(s) and a close up image of the rash (see examples below).
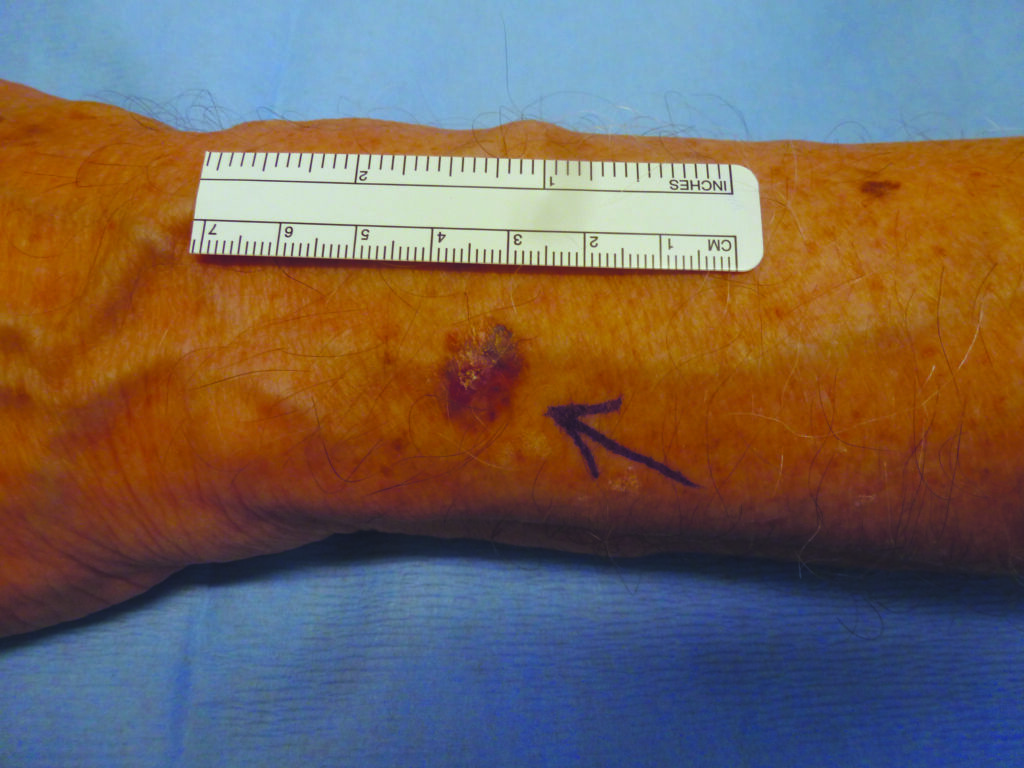
When photographing a lesion
Mark the lesion with an arrow using a non-permanent felt-tip/marker pen. If there is more than one lesion, number each one. Place a ruler (if you have one) near the lesion and make sure it is included in the photograph (see examples below).

| Overview photo | Close up photo | |
| Aim | Enables the doctor to identify the exact location (e.g. right or left hand, upper or lower back) and to compare it to other areas, if there are any. | Hopefully allows the doctor to make a diagnosis by naked eye. |
| Tips | The entire limb, head or back/chest should be visible in the photograph. | The affected area should be in the middle of the photo, and not too close to the edge. |
Check that the photographs are in focus before sending